• Photography
  • Interviews
  • Business
  • Reviews

Tiffinbox

Inspiring Photographers

  • Home
  • About
  • Blog
  • Contact

Photography Concentrate Offers Special Black Friday Deals For Photographers, Ends Nov. 29

November 24, 2011 by Seshu | Editor & Publisher

In the US, you are all just about ready to sit down and have a good meal with your family and friends. Here's wishing you a very Happy Thanksgiving, from my family to yours.

What comes next is usually considered the biggest SALE day of the year, or Black Friday. I haven't done that 2 am mall run in ages and have no desire to send you looking for stuff at such a witching hour either. Life isn't a scavenger hunt. Instead of buying “stuff” that will collect dust in no time, how about giving your brain a boost and learning some new techniques or getting your photography fundamentals down?

Photography Black Friday Sale

Full disclosure: Rob & Lauren of Photography Concentrate are friends. I love their products, I have used them myself and have learned a tremendous amount from them. Yes, even professionals need to keep learning. All the time. So the links you will find here are all affiliate links.

essential_camera_skills If you are just beginning to use your digital camera, consider buying Extremely Essential Camera Skills. Regularly priced at $49.95, if you buy it before November 29 (midnight), you'll save $19.98. I reviewed this gem of an ebook (comes with videos to explain a few necessary fundamental things about your camera) and everybody who has bought it through my affiliate link has thanked me later. With a whole lot of you buying cameras – be they point & shoot or DSLRs, you'll want to get this truly foundational course to get you going.

Once you have your photography skills down pat, you'll need help with editing them. The team at Photography Concentrate have a tutorial called Super Photo Editing Skills. It too is on sale. Instead of paying $79.95, you can buy it for $47.97, saving you $31.98. If you ever wanted to learn how to use Lightroom, this is a great video tutorial. What's awesome is that you can pause it, rewind and watch it again and again until the concepts and the steps make sense to you.

photo editing tutorial album design tutorialWhen you are done editing your images, you have a couple of choices. You can save them on hard drives or you can share them with the world. Albums are always a good choice because they have staying power. Awesome Album Design Skills, is another tutorial that Rob and Lauren have produced for portrait and wedding photographers. They show us how they use InDesign to quickly and efficiently create custom albums for their clients. This too will be selling for $47.97 through the end of November 29th, so you'll want to jump on this deal if you are ready to go pro. It's regularly priced at $79.95.

In addition to the sale, Photography Concentrate has a new free eBook – The Camera Buying Guide (do they just think of everything?) and giving away a Fuji Instax camera (brings you back in time to your Polaroid days doesn't it?).

Please remember that the sale starts NOW and ends on November 29th at midnight EST. If you do buy these products, please come back here and let me know what you thought about them. Your feedback is valued greatly.
Filed Under: Design & Illustration, Photography, Photography Workflow Tagged With: adobe photoshop lightroom, buy camera, camera, concentrate, digital camera, digital cameras, digital photography, digital single lens reflex camera, photographer, Photographers, Photography, photography skill, sale, special deals

You Got Extremely Essential Camera Skills?

August 22, 2011 by Seshu | Editor & Publisher

Right around the holidays last year, just about everyone I know bought or received a camera. No, these weren't the point & shoot variety (hey we have our iPhones for that right?). These were DSLR‘s or digital SLR's. The excitement over opening the camera was palpable. I know because I received several emails soon after asking me … “So, I got a DSLR, but my images still suck. Why?”

My first response was always, “did you read the manual?” The silence at the other end was quite telling. Most of us, I know fail to read our manuals. When I bought my first Nikon DSLR, which I believe was the D70, I don't remember diving into the manual either. On the one side, there is a new toy to play with and on the other, my ego was saying to me: “Yeah, I can figure this out. No problem.” That's until I started seeing images I'd be ashamed to show my mom.

Essential Camera Skills TutorialSo, if the manual is way too daunting, or even boring, what do you do? Until today, you could have scoured the interwebs and patched together a bunch of the info that may have helped elevate your game. That too is time consuming and unless you are nuts about photography or pursuing as a professional, chances are slim you would be inclined to curate that information, digest it and then deploy it on your next go around with your DSLR.
Rob & Lauren Lim, the duo behind Photography Concentrate, have just published Extremely Essential Camera Skills. I was one of the few lucky ones to receive a review copy gratis. Having seen some of their earlier tutorials – Photo Editing Skills and Album Design Skills, I knew this one was going to be special.

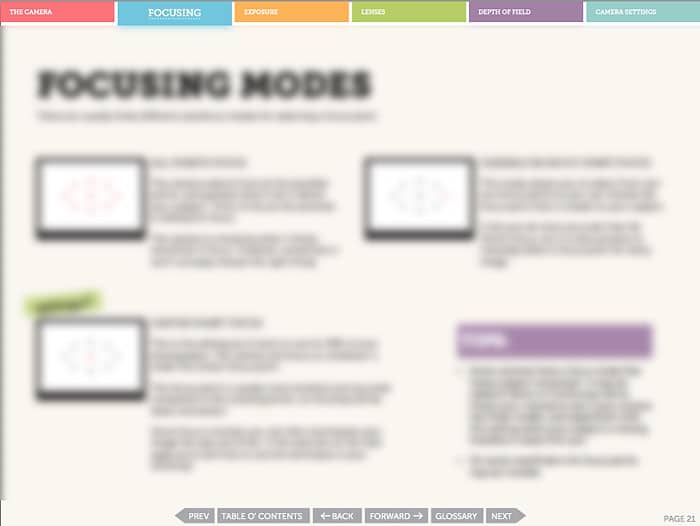
Think of Extremely Essential Camera Skills as the foundational course you forgot to take when you started experimenting with your camera. It's exquisitely designed – consistent with their other tutorials and extremely engaging website (which you must bookmark). When you open up the PDF, you are presented with a set of colorful tabs for the different chapters such as: The Camera, Focusing, Exposure, Lenses, Depth of Field and Camera Settings. I found the built-in navigation to be very helpful as it makes it easy to skip pages or navigate back to the ones you want to read again.

Extremely Essential Camera Skills Navigation

Unlike other tutorials that teach but fail to train, what I loved about Rob & Lauren's latest offering is that they are serious about making sure you get the concepts they have just taught before moving on to the next chapter. They do this through tips, exercises, videos (more on this in a bit) and pop quizzes. Though it is incredibly thorough, Extremely Essential Camera Skills is not a read it and forget it kind of manual. The lessons you will learn, each one at your own pace, will stick with you for a lifetime. The definitions and demonstrations are easy to understand and absorb.

As a professional, most of the concepts were familiar to me. But that's only because I use my camera every day, so it does become intuitive. Having a guide like Extremely Essential Camera Skills will help you get to that point where you too can easily make images you are proud to show your family and friends.

If there was one area where I could see the authors develop more content, it's the section on using an alternative to that pesky flash that everyone insists on deploying. To their credit they do say this: “The built-in flash on cameras generally sucks.” So true. May we see a sequel to this guide that will dwell on off-camera flash? I hope so, but I do believe this guide will lay the foundation for better images using flash. So, I do urge you to get this one first.

Extremely Essential Camera Skills Videos

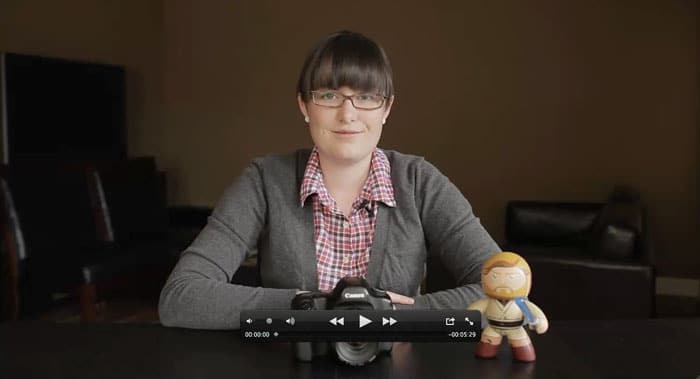
The 7 videos by Lauren are fantastic. Her even, conversational tone and excellent examples helped me better understand the concept behind exposure compensation. So, the take aways are many. With Rob & Lauren's permission, I am considering using this guide book for photographers (I really don't want to call it a manual) in the beginning photography class I teach high schoolers. Yes, it's that good and it is perfectly fitted to meet the demands of amateurs and semi-professionals too.

As I have already stated, I received a review copy Extremely Essential Camera Skills and loved it. If you are struggling to use your DSLR, this guide book will help you get comfortable. For the next two weeks starting today, Rob & Lauren are offering a launch sale. You can get Extremely Essential Camera Skills for $29.97, that's 40% off the regular price of $49.99. In addition to the 89-page PDF and videos which you can view on your computer or your iPad, you will receive the Extremely Essential Camera Skills Field Guide, which you can print and tote around while you are photographing.

Full disclosure: As an affiliate, I receive a commission on the sale of this PDF to support Tiffinbox. If you enjoy the content on this site, I ask that you use the links in this post to buy Extremely Essential Camera Skills. Thank you!

Filed Under: Books, Photography, Tutorials Tagged With: camera, camera flashes, camera settings, cameras, digital photography, digital single lens reflex camera, dslr, ebook, essentials, extremely essential camera skills, Flash, guide books, guides, manual, PDF, Photography, photography concentrate, rob & lauren lim, skill, technology, tutorial

Going Wireless: PocketWizard For Off-Camera Flash

June 15, 2011 by Seshu | Editor & Publisher

The very core of the Strobist experience is to use your flash units off-camera or studio strobe units on location. There are a lot of options in the market now that can help you do just that. From personal experience, though, I have used the PocketWizard Plus II Transceivers. More recently I switched to Paul C. Buff's CyberSync system. Now I am considering returning back to PocketWizard.

These two videos below by Mark Wallace have convinced me to make the move back. The videos show how the new units work with the Nikon camera and flash systems. I suspect, however, the way these units operate won't be too radically different if you are using a Canon system. So everyone is welcome!

How To Shoot With PocketWizard MiniTT1 and FlexTT5

How To Use The PocketWizard AC3 Zone Controller

For using these units on a Canon system, check out these video tutorials.

By sheer coincidence, I won these units some time back. So, you'll see an “open-box” video very soon. Stay tuned! Thanks to Mark Wallace and Phil Bradon of Mac Groups for sending me the Nikon version of these PocketWizard units. I can't wait to go out and play with them.

Below, tell me if you have considered buying these units or you have already invested in a RadioPopper or some other wireless system. Do you work with flash off-camera or studio units for your shoots? Do you have questions on how to set those up? Would you find it useful if there were more tutorials posted here on Tiffinbox? Let me know!

Filed Under: Off-Camera Flash, Photography, Reviews Tagged With: camera flashes, cameras, digital photography, electronics, Flash, j. mark wallace, live preview digital cameras, nikon, nikon camera, off-camera flash, Photography, pocketwizard, red digital cinema camera company, shooting, strobist, technology, Video, video tutorials, zone controller

How To Organize A Portfolio Into A Hardcover Photobook

December 6, 2010 by Guest

Ingrid Spangler, AvatarThis is Ingrid Spangler's second guest blog post for Tiffinbox. She is responsible for all the social media, as well as copywriting, promotions and marketing for AdoramaPix. She has been an avid photographer from the time she was a child, and studied film at Temple University in Philadelphia, where she learned about film theory and visual aesthetics. Her first post was about finding the perfect photography printing lab.

Hardcover photo books are fast becoming the best choice to present and distribute your portfolio. It’s a more permanent way to display your images, and while that is a definite plus, it also requires much more care when organizing and designing than just slipping your prints into the plastic sleeves. There’s also something about having your images in a book that leads the viewer to believe that the images should hold together and tell a story more than a traditional portfolio.

Here’s a general portfolio tip from my buddy Joe Holmes of joe's nyc focus on one style or genre of photography that you do best, such as landscapes or street photography or portraits. You can always do separate portfolios/books for each genre.

Another tip: Don’t let the design of your book overwhelm your images. Keep it simple. This rule goes for any photo book you make, but is especially true for portfolios.

From speaking to photographers and photo editors, it seems that the general rule when organizing your images into your portfolio is “put your best images in the front and the back; make a strong first impression, then give them something to remember you by.” While you can still use this tenet to start to set up your book, what do you do with all the prints in the middle?

Here are some suggestions for how you can sequence the images to have them hold together as something cohesive.

Organize Your Images By Color

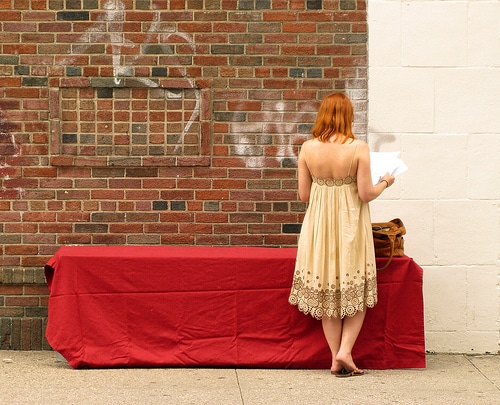
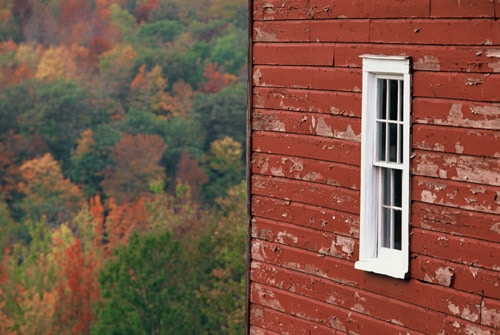
Allow the dominant color in one image to dictate what the next image will be. This is very subtle and works very well for images that are largely disparate. Take for instance these images with lots of red tones, the next images could be something with orange or deeper red as the dominant color and so on.

Keep moving through the color spectrum until you are close to the end of the book, where you’ll place your second set of strong images to leave a lasting impression on the viewer.

Red Table

Red Barn

Organize Your Images Graphically

Look for the strong, dominant lines in your images and pair them accordingly. This image with strong diagonal and horizontal lines is matched by an image with similar lines. For diagonal lines that go off the page, try as much as possible to have them point to the center of the book. This pairing also works because of the similar colors.

Boys On The Beach

Bridge

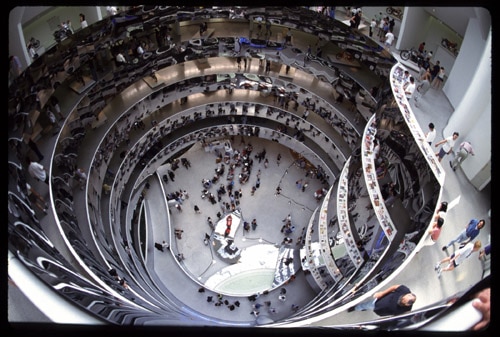
Or these circular shapes:

Guggenheim

Tunnel

*Images courtesy of Brandon Remler: Fall Trees, Boys on Beach, Bridge, Guggenheim and Tunnel. Red Table courtesy of Ingrid Spangler.

Group like with like: black and whites together, images that depict the same subject, etc.

Above all, choose a high quality lab to make your photo book portfolio! AdoramaPix photo books are printed on real photo paper, so they are the closest thing to a traditional portfolio. Unique lay-flat bindings ensure that none of your images are lost to a gutter in the center, plus you don’t have to worry about matching up halves of an image that you want to span both pages. PixPublisher, the online book creation and editing program, is easy to use and powerful, you can design your portfolio exactly the way you want, sizing and positioning your images precisely on the pages, down to the pixel!

Remember, it’s your work, don’t gamble with the presentation. You may only get one chance to impress someone, make it count!

Filed Under: Books, Photo Books, Photography Tagged With: books, digital photography, hardcover, hardcover photo book, how to organize, ingrid spangler, organize, photo books, photo editor, photobook, photograph album, Photography, physics, portfolio

Control & Chaos: Two Genres Of Photography

October 5, 2010 by Guest

Paul GeroThis is a guest post by Paul Gero, a wedding photojournalist based in Orange County. Paul is also known for being a terrific writer, speaker and teacher. He, his wife Nicki and now two kids are wonderful people to know.

Having been in photography for a little while, I find that the work falls down into basically two approaches: Control and Chaos.

Doing Control type work is about setting up, posing, lighting and forging a bond that elicits the desired response.

Much of the commercial world and a lot of the wedding and portrait world is in that category of Control.

A few reasons why it might be so popular:

a) The desire to create an image that looks familiar (and with the web more images are shown and seen than ever before).

b) The desire to create an image that you know will be client pleasing and you know will sell.

c) A newer photographer with new found skills and less certain about capturing things “on the fly”.

The Chaos approach has been around for decades practiced by many of the greats including Henri Cartier-Bresson, Josef Koudelka, Larry Towell and others.

Many of the great photographers from the famed photo agency Magnum work in this manner. These are some of my favorites primarily because of the way the see the world, the moments they capture and the way they structure their photographs.

It’s a style that takes practice to master. It's about looking, watching, spending time in the field with a camera, and anticipating — it's not always reproducible, but it will always be interesting. Serendipity is a huge part of the equation of Chaos photography — that can be scary but also hugely rewarding.

It takes thinking about how you'll approach a situation from where you position yourself in relation to your subject, where they are in relation to the background and what focal length you'll use to make this type of photograph.

I recommend to my students is they watch people especially as they gather at a mall, for example. Notice how they stand, how they greet people (and cultures are different).

Then when watching those interactions think about where you would need to be to make a great photograph of that situation. What lens would you use? How far would you be from the subjects?

Selecting a spot to stand in relation to your subject in the Chaos realm is important. This location along with your focal length determines how much context will be revealed in the photograph. And typically you’ll want to see that subject’s face in order to capture emotion (the eyes reveal the soul, as they say). That often means being in front of or to the side of your subject.

When I worked in Washington DC and covered events with the President, it was interesting to watch how the Associated Press determined their coverage and would station a photographer front and center of the President. That was a safe angle, and often times the best angle.

They would position another photographer off to the side for most events — that 45 degree or called the “cut away” angle.

This angle adds depth to the photo as the subject to the right or left of the President would often be slightly out of focus (with a telephoto lens). It would be a good angle if the President was looking in the camera direction, and perhaps less successful if he were to look to the opposite side.

Selecting the angle behind your subject is a lower percentage choice, but can be useful as this position gives the viewer a sense of “walking into the sunset”, or leaving. That aspect makes it useful and can help creating a natural looking end to a story.

While observational skills and camera position are critical to successful Chaos photography so is being in control of your technical skills.

Knowing light, knowing exposure, knowing when to trust or not trust your meter all play into that role.

Many photographers use the auto modes on a modern camera to “set it and forget it” and while that can work and does in many cases, there are times when it can get you in trouble especially if you’re not paying attention to the choices made by the camera or get sloppy in where you meter and hold the exposure value.

When I choose my working settings, I start from selecting aperture first, in order to create the look and depth of field on the scene (especially using wide or normal lenses).

My shutter speed choice then coincides with a good exposure for that scene based on the ISO (typically using the lowest ISO for optimum quality while still being able to get the desired shutter speed). I also consider the amount of movement in a scene in order to select the appropriate shutter speed to stop the action.

Lens selection is critical for Chaos photography.

Much of what I call the inspirational photography in this genre is often made with simple focal lengths, either slightly wide or normal (i.e. 28mm, 35mm, 50mm lenses on 35mm cameras). Rarely do you see a lot of this work done with extreme wide angles and extreme telephotos.

These lens choices also force an intimacy with your subjects in terms of your position to them. It’s much tougher to hide when you’re using a wide or a normal focal length lens, as is possible when using long zooms or telephotos.

When you’ve become really disciplined using one, two or three focal lengths, you begin to see the world taking place on the stage for those lenses. You get comfortable framing with the the imaginary lines of those focal lengths.

Zooms are popular and can be useful tools, though I find that primes often help photographers hone their vision especially when learning. It forces you to move to frame, rather than zoom to frame.

I know for me when using zooms I have to be very disciplined to not just zoom out when I should be moving my feet to frame. In fact, I try to use the zoom like a prime and determine the focal length I want to use, set it on the zoom and then move to frame but not zoom unless I absolutely must (especially with a zoom such as the 24-70mm; less so with a long lens such as the 70-200mm).

Metering light which then translates to a great exposure is critical especially in fast-moving situations.

I find that using an old school incident meter is great in this area. It allows me to dial in the exposure so that helps exposure consistency from frame to frame. Even if you only use an external meter for a while as you learn the patterns of lighting, I think it can be extremely useful.

This gives you one less thing to think about because you’ll know that exposure is handled.

Look at the scene and anticipate what would happen if you change position or your subject’s change position. Think ahead and pre-visualize where the subjects might go can help you successfully handle any change in exposure.

I can’t stress it enough: Exposure is a critical component to successful photography — and especially digital photography.

To paraphrase my instructor, famed National Geographic photographer William Albert Allard: You have to get your exposure dialed in because you’d hate to lose a portfolio photograph due to a lousy exposure.

He was right when he told me (and we were shooting transparency film) as he is today if you’re shooting digital.

What I enjoy most about Chaos photography is that it’s more about capturing life as it happens, as opposed to having it set up by me. It takes more time for this to work, because you have to be able to witness things — having a five minute window with a subject often precludes that and reduces you to do Control work.

I find that life is so much more fascinating and people do much more interesting things than I could ever set up.

I loved to be surprised when looking through the lens and use that as a guide to know if I'm in the presence of an interesting photograph — if it moves me, excites me, or causes an emotional response in me while I'm photographing, it will usually translate in the actual photograph.

Perhaps folks who prefer Control photography are not certain that good or great photos will even materialize therefore they want to ensure that they do.

All I can say from years of experience is to trust that they will — if you have time. Wherever people gather there is a potential for great photographs. And you will often be surprised by the photographs these subjects give you.

The human element makes that happen. The energy from an event makes it happen. You just have to have faith that you’ll see those moments when they happen and using your skills acquired from practice and observation, you’ll be in the right place at the right time.

Knowing how to create nice Control images is a part of the modern photographer’s tool box, no doubt, but I think it should be a piece of the box, not the whole thing.

Practice your observational skills and your technical skills and be prepared to be surprised with the beautiful and incredible chaos that is life and then capture that feeling with your camera.

What kind of photography do you practice? Do you agree or disagree with Paul? Your comments below will create a dialogue that I will welcome here on Tiffinbox. So please take a moment to tell us what is on your mind. We're listening to you!

Filed Under: Photography Tagged With: aperture, camera, chaos, control, controlled chaos, controls, digital photography, exposure, focal length, genre, genres, optics, paul gero, photographer, Photographers, photographic lens, Photography, physics, science of photography, shutter speed, telephoto lens, wide angle lens

  • « Previous Page
  • 1
  • 2
  • 3
  • 4
  • Next Page »

Subscribe To Tiffibox Treats!

Looking for a well-curated email newsletter that will leave you inspired and motivated about your photography business? Sign up below!

About Seshu

Seshu creates relaxed portraits of families and high school seniors in Avon, Connecticut. He also leads a successful headshot photography studio in Connecticut, helping professionals from a variety of disciplines project the very best versions of themselves. He created Tiffinbox as a way of inspiring photographers, to create better images and successful businesses. [Read More]

Email Templates For Headshot Photographers

Email Templates for Headshot Photographers

Recent Posts

  • How Capture One Changed My Event Photography
  • 10 Steps To Stay Positive In Times Of Great Stress
  • Why You Need To Read “Personal Branding For Photographers” Now
  • How To Master Your Website Content Step By Step?
  • Tony Taafe’s TNT Method For Headshot Photographers

Recent Comments

  • Stephen Davison on Are You A Business Owner Who Is Smart, But Stuck?
  • Ben A. on Don Giannatti Clinches The 8th Annual Tiffinbox Award
  • Dan on Don Giannatti Clinches The 8th Annual Tiffinbox Award
  • Donald Giannatti on Don Giannatti Clinches The 8th Annual Tiffinbox Award
  • Stephen Davison on G.E. Masana’s 6 Strategies For Wedding Photography Success
  • Naveen Kumar on Weddings In India Are More Than Being At The Right Place And At The Right Time
  • kartick on Weddings In India Are More Than Being At The Right Place And At The Right Time
  • Leonid Farbman on 6 Uncommon Trends To Grow Your Photography Business
  • Willow and Finch Wedding Photography on 11 Reception Tips To Help Your Wedding Photography
  • Web Designer Malaysia on How To Optimize Your Squarespace Website For Search Engines
  • Creastan on An Interview With Photojournalist G.M.B. Akash
  • Cindy Brown | Atlanta on An Open Letter To A Local Photographer

Become a Patron!

Copyright © 2026 · Tiffinbox · Site Design by Heather Mackan Creative · Built on Genesis